Quick Reference
Swap Nodes
Swap Style Nodes
You can quickly swap one style node for another, by first selecting then right clicking and using the Swap Node menu to change it for another style node. Connections to and from the node will be maintained.
Swap Color and Select Nodes
You can also swap the select and color nodes for other nodes from those categories.
Transforming Objects
Keyboard Shortcuts
- Grab G : Grab and transform / move the currently selected object.
- Scale S: Scale the current object
- Rotate R: Rotate the selected object
Lock the transforms to any of the axes by using the X, Y, Z keys after starting the transform. Lock the transform to be perpendicular to those axes by using Shift + axis key.
Origin Point
All of the points in an object are relative to an origin point (the small orange dot that is visible when the object is selected). When rotating an object, it will be rotated around its origin point. You can cahcnge this origin by through the right click context menu and using the Set Origin submenu.
Clear Transforms
To reset the rotation, translation or scale back to the original state, use the Alt + (G / R / S) to clear the transform for that transformation.
Apply Transforms
Ctrl + A All of the objects in Blender are in reference to the word origin. Applying their transformations makes the current location, rotation and scale be the starting location, rotation and scale. Can help with fixing some rotation and offset issues.
Materials
Materials for regular objects are set through the Material tab of the object. When using Geometry Nodes you must manually set the materials with a Set Material node. The Molecular Nodes Style nodes all set the material of their outputs.
Render Settings
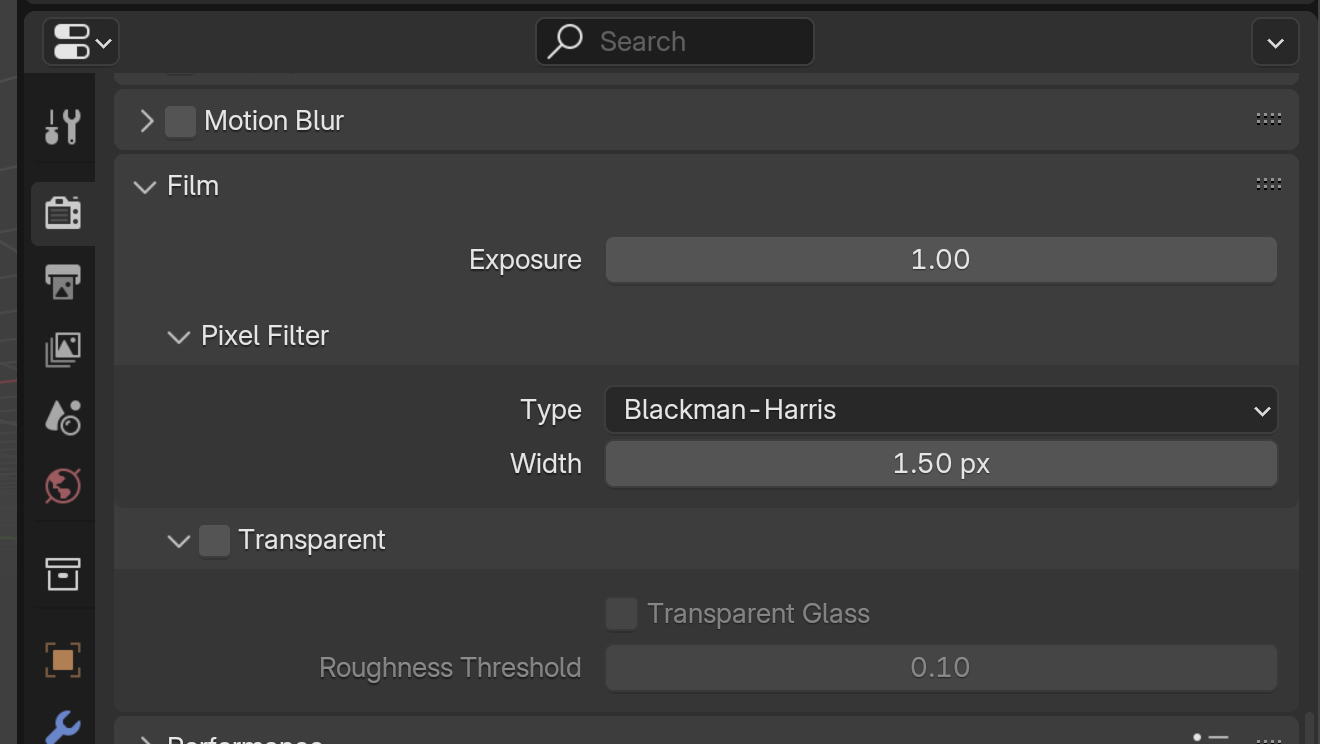
Transparent Background
Check the Transparent option under Render Settings -> Film -> Transparent.

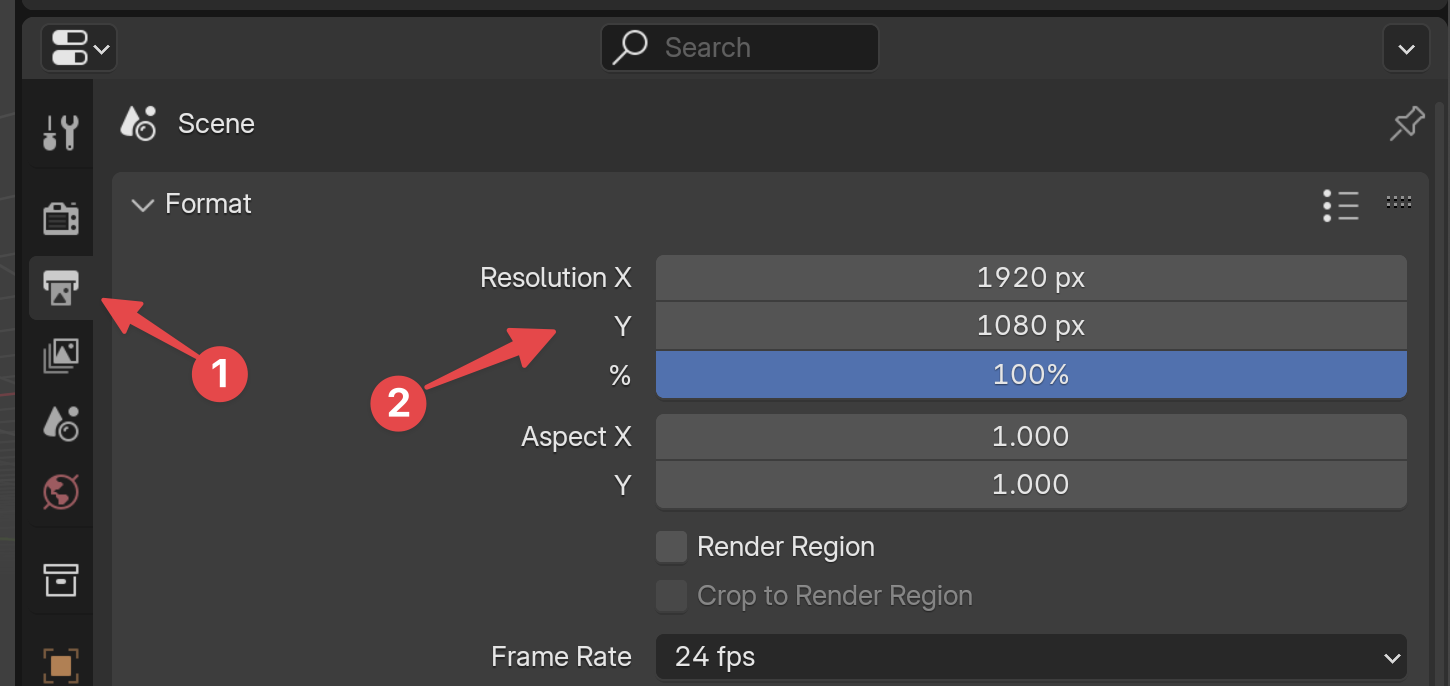
Output Resolution
Change the output resolution of under Output Properties . This output resolution also changes the aspect ratio of the camera. For a portrait camera output - it is best to change the output resolution and not rotate the camera.

Render Engine
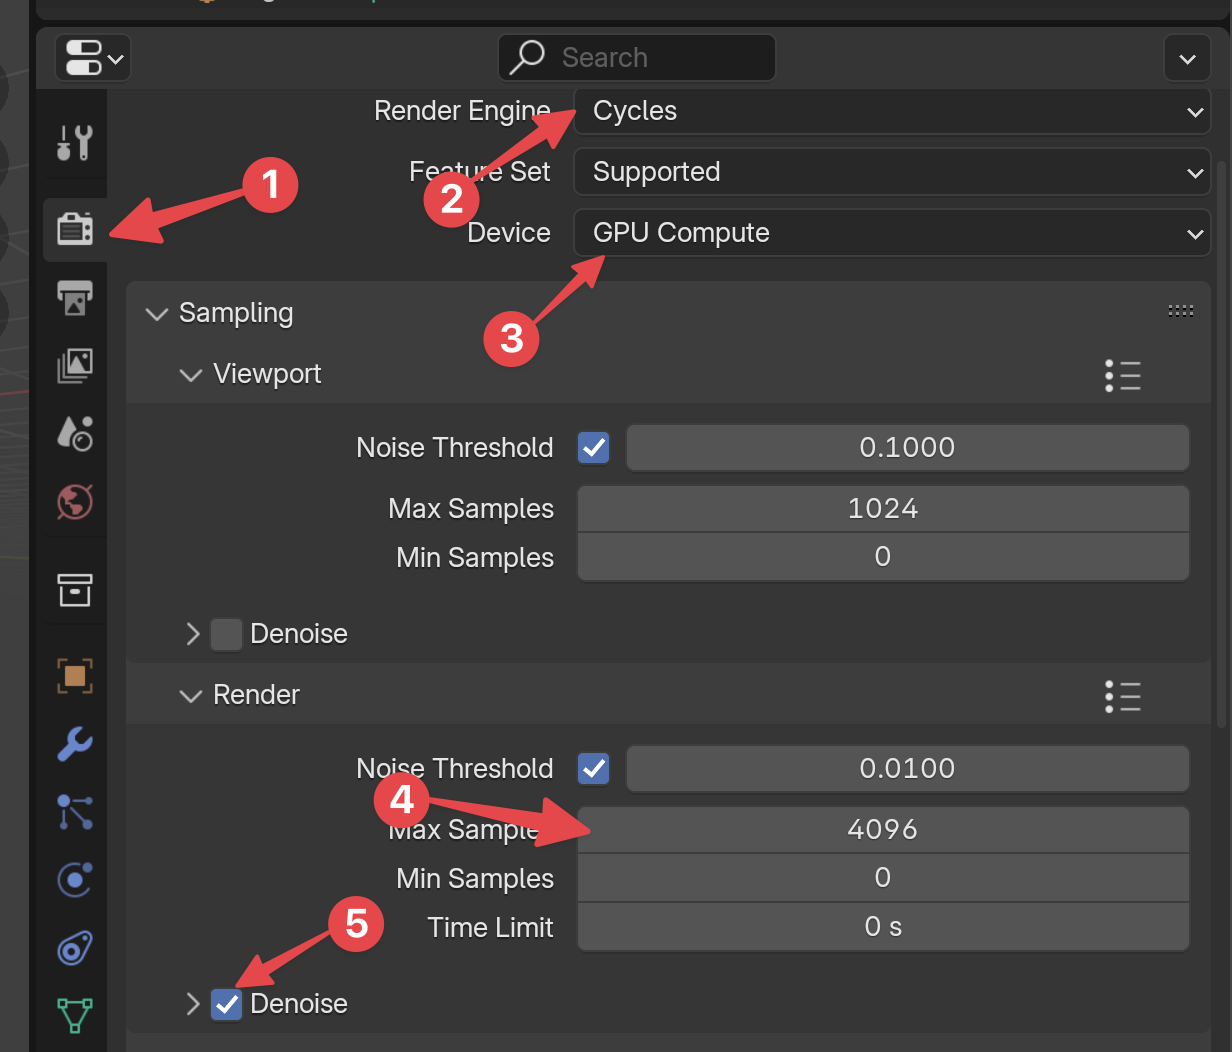
Changing the render engine is done under the Render Properties tab (the icon is the back of DSLR camera). When using Cycles render engine, if you computer supports it, you should likely enable GPU Compute to use your GPU for rendering which will likely be faster.
Render Samples
The number of will determine how long Blender will spend rendering the image. The higher the samples, the longer it will spend calculating the final image and the less noisy the image will be. The more complex the lighting and materials are in your scene, the higher the samples you will need to get a less noisy result. It is worth experimenting with the number of samples you need when rendering an animation. If you can get away with lower numbers (~256) it will save you a lot of render time.
The Denoise option is for using AI denoising after rendering, so you can get away with lower samples for a similar result. If possible, I recommend changing the to use GPU.
